How to Convert HEIC Photos to STL for 3D Printing
By Faisal | November 7, 2026 · 10 min read
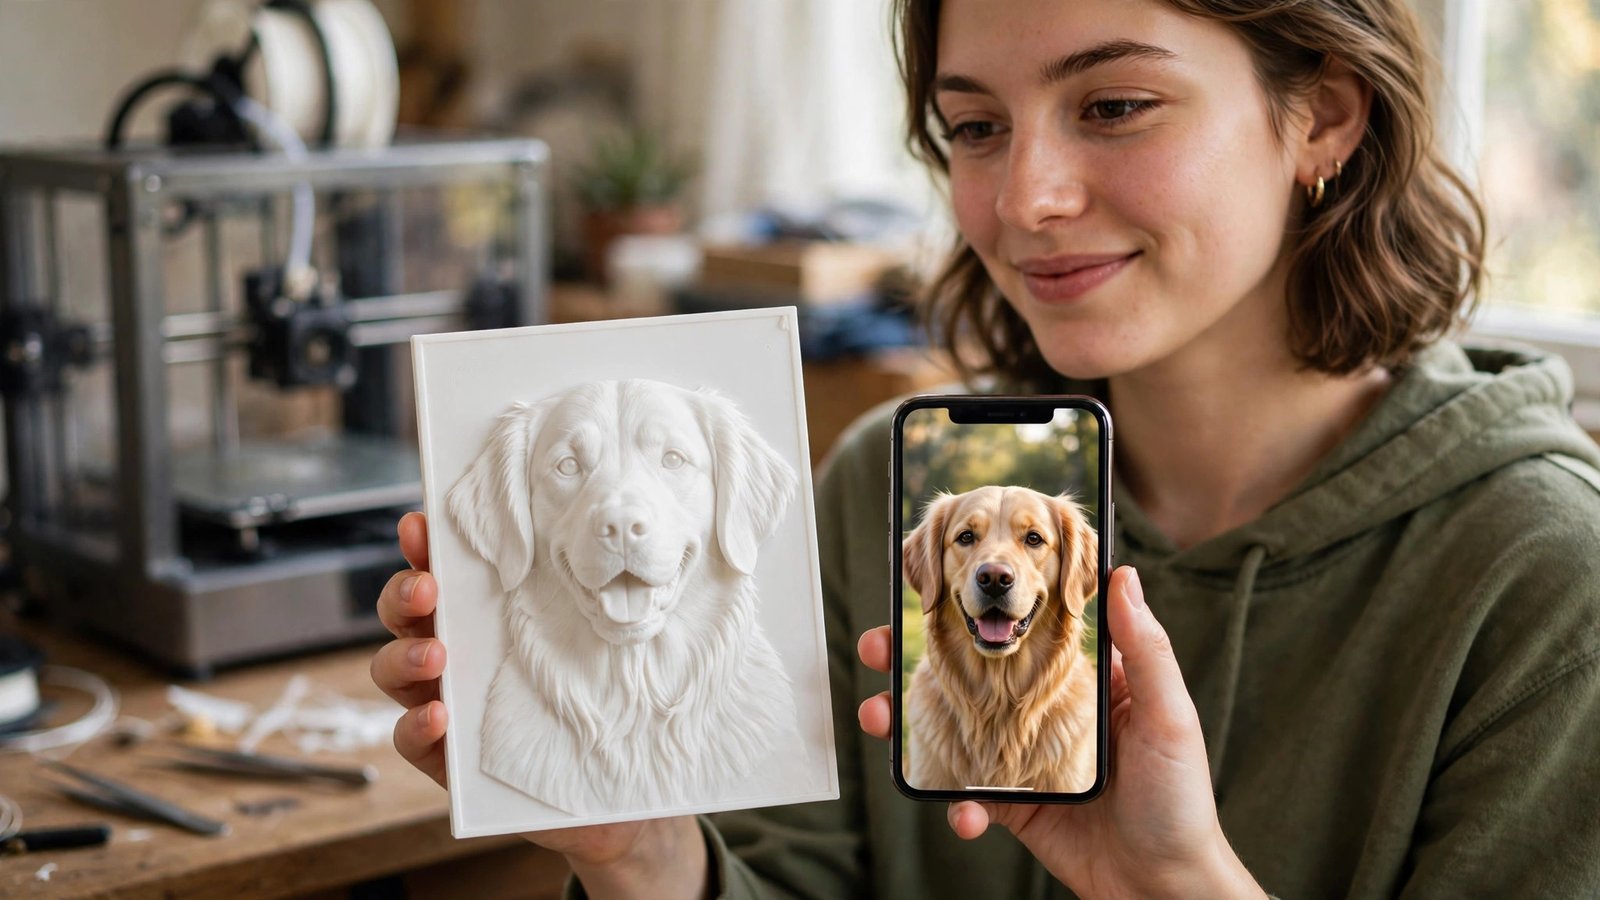
You took a perfect photo on your iPhone and want to turn it into a 3D print. You open an image-to-STL converter, drag the file in, and nothing happens. The problem is almost never your photo — it is the format: your iPhone saved it as HEIC, and most STL converters, including this one, do not accept HEIC files directly.
This guide explains the two-step workflow that works: convert HEIC to JPG or PNG first, then turn that file into a printable STL relief on imagetostl.net. It takes about five minutes and costs nothing.
What Is a HEIC File, and Why Won't It Convert Directly?
HEIC stands for High Efficiency Image Container. It is built on the HEVC (H.265) video codec, and Apple made it the default photo format on iPhones and iPads starting with iOS 11. Apple chose it because it stores a high-quality photo in much less storage space than an equivalent JPEG, which matters when a phone holds thousands of photos.
That efficiency has a trade-off: support outside Apple is poor. Many browsers cannot open HEIC at all, Windows and many websites do not recognise it, and most 3D tools were built around PNG and JPG. HEIC also has no transparency channel, so background removal depends on the converter's own detection.
That is the key fact to keep in mind for this guide: imagetostl.net accepts PNG and JPG files up to 10MB. It does not accept HEIC files. I checked the converter's own upload page on November 7, 2026, and it lists PNG and JPG only. Some other converters have started accepting HEIC directly, but if you try to upload a HEIC file here, it will fail — not because your photo is bad, but because the format is not supported. So do not fight the format. Convert it first, in about a minute, and then convert to STL.
HEIC vs JPG vs PNG for STL Conversion
| Format | Where it comes from | Works with imagetostl.net? | Best for STL? |
|---|---|---|---|
| HEIC | iPhone / iPad default since iOS 11 | No — convert it first | Only after converting to JPG or PNG |
| JPG | Almost every camera and phone | Yes | Good, if you clean up compression noise and use smoothing |
| PNG | Screenshots, exports, edited images | Yes | Best starting point — lossless, no compression artifacts |
If you have a choice, pick PNG — it is lossless, so it avoids the blocky compression artifacts JPG adds, which the converter reads as tiny height changes.
Worked Example: A Dog Portrait from iPhone to Printed Plaque
Example used below: a close-up iPhone photo of a dog, face filling the frame, original HEIC about 2MB. The goal is a 100mm-wide relief plaque, 4mm tall, to hang on a wall.
Step-by-Step: HEIC Photo to STL
Step 1: Check that your photo really is HEIC
On an iPhone, open the photo and swipe up — it will say HEIC if that is the format. On Windows, a HEIC file often shows no thumbnail. Check the extension: .heic means HEIC, while .jpg and .png are already fine and you can skip to Step 3. Also check the size: the converter accepts files up to 10MB, and a full-resolution iPhone photo is usually well under that.
Step 2: Convert HEIC to JPG or PNG (three reliable ways)
Pick whichever method matches the device in front of you. All three are free, and all three keep the full resolution of the original.
Method A — Change the iPhone setting for future photos (and export this one). On your iPhone, go to Settings > Camera > Formats and choose "Most Compatible" instead of "High Efficiency". From now on, new photos will save as JPG. That does not change photos you have already taken, so for the one you want now, open it in the Photos app, tap Share, and choose Save to Files or send it to yourself by email or AirDrop — iOS converts HEIC to JPG automatically when you share it that way. Check the exported file ends in .jpg before you upload it.
Method B — Export from a Mac. Open the photo in Preview, choose File > Export, and set the format to PNG (cleanest) or JPEG at maximum quality. Preview converts locally, so your photo never leaves your computer.
Method C — Use a free HEIC converter on Windows or in a browser. In Windows Photos, use Save a Copy and choose JPG, or use a free online HEIC-to-JPG converter. Do not screenshot the photo: a screenshot is a low-resolution copy of your screen, and it will make a blurry, blocky relief.
After converting, open the new JPG or PNG and look at it closely. It should look identical to the original — same colours, same sharpness, same crop. If it looks washed out or much smaller, convert it again with the quality set to maximum and the size set to original.
Step 3: Clean the converted image up for a heightmap
An STL relief is a heightmap: brightness becomes height, so light areas rise and dark areas sink. Colour carries no height information — two minutes of cleanup now makes a noticeably better print.
- Convert to grayscale in your head, then in the image. Look at the photo in black and white — that is what the heightmap will see. If the subject and background are similar shades of grey, raise the contrast until the subject stands clearly apart from the background.
- Crop tight. In the dog example, I cropped out the garden fence and most of the grass, leaving the dog's face and ears filling the frame. Empty background becomes unwanted raised texture, so crop it away.
- Remove the background if you only want the subject. A free background-removal tool does this in seconds. For a portrait plaque, a clean subject on a plain background prints far better than a busy scene.
Step 4: Upload to imagetostl.net and set the conversion
Open imagetostl.net and drag your converted JPG or PNG into the upload area, or click to browse for it. The tool works entirely in your browser — your image is never uploaded to any server. Then set the controls for a portrait relief like this one:
- Max Height: 3–5mm (I used 4mm). Lower looks flat; higher exaggerates noise.
- Smoothing: Turn it up for photos — it softens JPG compression artifacts. Leave it low only for sharp geometric designs.
- Add Base: On, 2–3mm — it keeps the plaque stable and gives a flat first layer.
- Remove Background: Turn it on if you did not already remove the background in Step 3. It stops the background from becoming raised texture.
- Invert Height: Leave it off unless the relief comes out backwards — for example, a dark dog on a white background where the dog sinks instead of rising. One click fixes that.
Drag the 3D preview to rotate the model. Lumpy flat areas need more smoothing or a cleaner source; missing detail needs less smoothing or more contrast.
Step 5: Download, slice, and print
Click "Convert to STL", download the file, and open it in your slicer. For a 100mm portrait relief, start with:
- Layer height: 0.12–0.2mm. Finer layers show more facial detail; 0.12mm is worth the extra time for a portrait.
- Infill: 15–20% is plenty for a decorative relief; the base provides the strength.
- Supports: None needed if you print the plaque face-up on its base. Scale check: STL files carry no units, so confirm the model reads 100mm wide in your slicer before printing. Filament: Plain PLA in a light colour shows relief detail best.
Then slice and print. A light sanding pass smooths any remaining layer lines on flat areas, and the plaque is ready to hang.
Troubleshooting HEIC Conversions
The file still will not upload
Check the extension again. If it still ends in .heic, the conversion in Step 2 did not actually happen — some sharing methods keep the original format. Export it again and confirm the new file ends in .jpg or .png before uploading.
The converted JPG looks washed out
That is usually a colour-profile issue from a converter that stripped the photo's colour data. Convert it again with a different method — Preview on a Mac or the iPhone share export usually preserves colour best — and compare the two files side by side.
The relief looks lumpy or noisy
That is JPG compression noise, not a HEIC problem. Raise smoothing, lower the max height to 3mm, and go back to Step 3: convert the photo to grayscale, raise the contrast, and remove the background. A cleaner source image fixes more than any setting can.
Common Questions
Can I convert a HEIC photo to STL directly, without converting it first?
Not on imagetostl.net — it accepts PNG and JPG only, up to 10MB. Some other converters have started accepting HEIC directly, but here the reliable route is HEIC to JPG or PNG first, then JPG or PNG to STL. The extra step takes about a minute.
Will converting HEIC to JPG lose quality?
Almost none that matters for a relief print. Export at maximum quality and original size, and do not screenshot the photo — a heightmap reads brightness, not fine colour detail.
Should I choose JPG or PNG after converting from HEIC?
PNG if you have the choice. It is lossless, so it avoids the compression artifacts that JPG adds. JPG is fine too, especially for photos, as long as you use smoothing in the converter.
Can I batch-convert a whole iPhone album to STL?
Convert the HEIC files to JPG or PNG in a batch first, then convert each one to STL separately — each photo needs its own contrast and height settings.
Does converting HEIC to STL work for Live Photos?
Only the still image matters. Duplicate the Live Photo, turn Live off for the copy, export that still frame as JPG or PNG, then follow the steps above.
Ready to try it?
Convert your iPhone photo to a 3D model right now — completely free, no sign-up needed.
Open the Converter →Additional Details
- Name: How to Convert HEIC Photos to STL for 3D Printing
- Description: iPhone HEIC photos will not upload to most STL converters. Convert HEIC to JPG or PNG first, then turn it into a printable STL relief — step by step, with settings that work.
- Published: 2026-11-07